Saturday 30 July 2011

End of day 2

I accomplished a lot today.  First I patched the holes in the wall.  There are lots of great videos on the web about how to patch drywall.  I personally like this one How to patch holes in drywall.  It won't be ready to sand until tomorrow afternoon.

It's a little hard to see with limited light in the bathroom right now.  I have 3 different colors of paint on the wall to help choose one.  Could this be considered modern art?

My son came over and helped me to take out the old toilet. It's not hard to remove or install a toilet but it is heavy so I enlisted his help. We took the old one out to the garage for now. I bought a Wagjag coupon to have 250 lbs of junk removed for $35. After the electrical experience I'm wondering if they are going to make me load up the truck myself.

I also cut and dry fit all of the tiles.  


Last but not least I mowed the lawn and now I am going to go and 
sit on the swing for a while and enjoy a perfect summer evening!

Day 2...

The electrical work took place yesterday but I ran into a snag and haven't quite sorted out how I'm going to proceed now.

Here's what the electrician's work accomplished.


In my DIY world I have had great successes at saving money, which has always been a hugely important consideration. I've had to put in time and effort but am usually pretty happy with the end results. I carefully think through how I'm going to accomplish my goals on a frugalista's budget and I know I don't need to tell the single mom's out there how important it is to budget carefully.  

Sometimes, however, things don't go according to plan. I had called a glass shop and asked if they could drill holes in a mirror that I wanted to mount on the bathroom wall and then install my lights right on the mirror. They said they could do this. I knew that the electrical would have to be done first because you'd have to know where the fixtures were going before you could cut the mirror. The electricians (who I hired by buying a kijiji coupon for $200 worth of electrical work for $39) I had to pay $178 over and above the coupon because they charge an $85 service charge (not mentioned in the coupon deal) and they went over the 1 hr and 10min the coupon covered.  They did a good job and you see from the photo the end result. This, however, was the first unexpected expense of the day.  

The big hole at the top of the photo is from the very first light fixture that was in the bathroom when I bought the house 13 years ago.   I must dig up a photo of what the bathroom looked like prior to my first renovation and share it with you. 

The electrician's installed the electrical at a distance that we all decided was a good spot. Then I went to the glass shop.... turns out that they can't cut holes in a thinner mirror which I did not know to ask about when I called them.  They can cut me a thicker mirror but the price of my project (not counting the electrical) went from $40 to $150 for the mirror and I would either need to keep the existing mirror ($40) for the frame or build a new frame. I left the shop undecided. 

I went to 3 different places after that to look at alternative mirrors that would fit the space of 24" between the light sconces. To bring this long and boring narrative home I still haven't figured out the solution.  No matter what, I did have to have electrical work done, but If I'd known to begin with that the store bought mirror was too thin to be cut I would have probably had the electrical installed differently.  

I found one mirror and brought it home but the lights are so snug against it that I don't know if I can actually use it. I will have to put on my thinking cap. I have to patch the hole at the top of the wall...so I'll go do that and .....think.

Thursday 28 July 2011

The time has come...the time is now

Is anyone finishing that line with "Marvin K. Mooney will you please go now"? If you are then you are probably a Dr Seuss fan. I LOVED reading Dr. Seuss to the kids when they were little. Reading to them at bedtime was an every night ritual that I sometimes miss but I'm not so mature that I couldn't enjoy a little Dr Seuss even now...all by myself.

I always seem to be renovating something and I keep saying 'no more' but then I spend an evening knitting and watching HGTV or DIY network and I get all inspired and soon I'm imagining another new 'look' for some corner of my kingdom.

I have thought about updating the bathroom for a couple of years now. I did a renovation on it 10 years ago and although the fixtures are still in pretty good shape I'm ready for a change. I was very much into a country style of decor for a long period and there are still things I like about the simplicity of that look and the fact that it's very easy to repurpose found treasures or build from inexpensive materials. However, it tends to be a bit cluttery and dust catchy and I would rather knit than dust.  Normally I love a good reno project...but this time I just wasn't feeling it.  At first I didn't know why.  I was thinking that I would tile everything including the shower, put new doors on the vanity (keep the top) but I just wasn't feeling my normal enthusiasm.  I was tired thinking about all the work and the expense.  One morning in the shower it dawned on me...why do I think I have to completely redo everything.  There was nothing wrong with the tile in the shower nor with the vanity and in an instant I realized that just doing the cosmetics would make a great difference and I didn't have to completely re-do everything.  It was a relief and it got me excited about the update.
This is the bathroom as of July 2011

I built the medicine cabinets using old shutters as doors. The valance has a twofold purpose, it supports the light fixtures (which look more space age than country and never did suit) and I filled the top of it with ivy and garden themed decor. I built the little box in the upper right corner and painted the pots inside that hold candles. I also painted the watering can.


I built the little shelf over the toilet and a few of the knick nacky things on it.  I loved the shower curtain.  It was so cheerful but now it seems a bit cartoony.


I built this towel bar.  It's a bit funny because I've always been afraid of birds (childhood trauma story best left for another day)  birdhouses are so country though so I had to throw a few in.  I also think it's good to face fears and dislikes.  I've never been a cat person and now I live with two of them and I actually kind of like them.  (please don't tell my daughter).  But..... there is no way I will ever like CCR, onions, pumpkin pie, or rude people - those are non-negotiables.

I had to get all of the clutter pulled off the valance tonight after stopping to pick up some of the supplies that I'll need for the rest of the renovation.  I can do quite a bit on my own but tomorrow I have an electrician coming at 9 to move the light fixtures.  I'm tenacious and unafraid of trying, but I'm not crazy.

I have no idea how long the rest of the process will take.  There is patching and painting and tiling and toilet removing that needs to happen.  But stay tuned...I hope the final product will be well received.

“Kid, you’ll move mountains!  Today is your day! Your mountain is waiting. So…get on your way!” – Oh! The Places You'll Go - Dr. Seuss

Sunday 24 July 2011

I got myself in a jam

I didn't really get in a jam, but I made some.


I have saskatoon trees in my yard and last year was my first big crop.


This year we have had unusually cold and rainy weather so they aren't ripening as fast as they did last year but I was still able to pick an icecream pail full on Saturday.


and make 15 varying sized jars of jam.


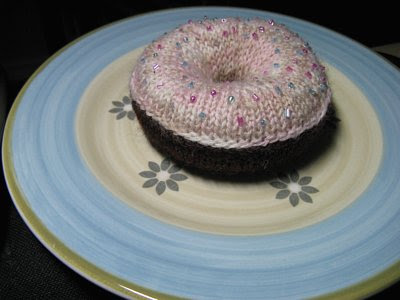
There will be a lot more to pick yet and I see pie in my future.  In the meanwhile I have to be content to admire this donut that I knit up.  Found this cute pattern here the only modification that I made was to use size 3mm needles instead of the recommended 2mm.  I did make one with the 2mm and it was miniature size.  The 3mm gave me a pert' near perfect size.


I spent some productive time last week knitting.  I decided to write down exactly what I wanted to accomplish by weeks end and managed to get more done than I sometimes would.


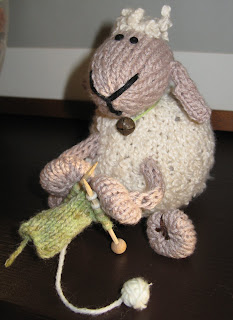
Stitchy Baa

I made 3 of these coffee cup cozies to use as gifts.


Sunday 10 July 2011

What I'm working on


Well I've spent a good chunk of the day getting myself up to speed on Flickr, Blog styles, Picassa, Picnik (and not the good kind with food, the photo editing kind Picnik, which is quite good but you can't eat it).  The ultimate goal today was to get some of my project photos up.  I finished the Teddy Suit from Lois Daykin's book Baby Knits about a month ago.
GRIZZLY ADAMS BABY SUIT


I made a few modifications to the pattern that I'll list here for anyone who would like their suit to have the same 'look' that I have given it.


I found that the hood portion of the pattern a bit odd and after Row 6 when you change to 5mm needles I omitted the shaping "Starting with patt row 2, work in patt as given for Left Leg" and just worked in St St to the required length.


I also created my own mitts and paws pattern.  


Paws:
With 3mm needles cast on 33 sts.
K1, P1 rib for 10 rows, inc 2 sts evenly on last row (35 sts)
Change to 3.5 mm needles
Row 1: Knit
Row 2: Purl
Row 3: K8 in MC, join CC and follow mitten graph below


Work 1 row even in MC
Last row: K1, K3tog across, cut yarn leaving about 12" for sewing up.  Thread through stitches on needle and pull tight to gather top of mitten.  Sew side of mitten and attach to arm of suit.


It might be a good idea to attach a bit of velcro to the mitten and the arm of the sleeve so that it doesn't flop around.


Booties:
Using 3.5 mm needles and MC, cast on 6 sts.
Row 1: knit
Row 2: Purl, inc 1 st each end of row (8 sts)
Row 3: Knit, inc 1 st each end of row (10 sts)
Row 4: Purl inc 1 st each end of row (12 sts)
Row 5: Knit, inc 1 st each end of row (14 sts)
Row 6: Purl
Rows 7 - 20: follow foot pattern on graph


When chart is complete start dec 1st each end of row until you have 6 sts.  Purl 1 row then work as follows:
Row 1: Inc 3 sts across (9sts)
Row 2: Purl
Row 3: Inc 1, K2, Inc 1, K2, Inc 1, K1, Inc 1
Row 4: Purl
Row 5: Inc 1, K3, Inc 1, K3, Inc 1, K3, Inc 1 (17 sts)
Row 6: Purl
Row 7: Inc 1, K4, Inc 1, K4, Inc 1, K4, Inc 1 (21 sts)
Row 8: Purl
Row 9: Inc 1, K6, Inc 1, K6, Inc 1, K5, Inc 1 (25 sts)
Rows 10 - 20: work in St St
Row 21: K 10 sts (work only these 10 sts)
Row 22: Purl
Row 23: K7, K2tog, K1 (9 sts)
Row 24: Purl
Row 25: K6, K2tog, K1 (8 sts)
Row 26: Purl
Row 27: K5, K2tog, K1 (7 sts)
Work in St St for 10 more rows and cast off.
Rejoin yarn to remaining 15 sts.  Cast off 5 sts.  Working on 10 sts follow the same pattern, reversing shaping to match.
Stitch bootie sides together and sew bootie opening to ribbing on leg bottom.

Wednesday 6 July 2011

Fits n' starts

Getting this blog going is harder than I thought it would be.  I so want to share all of the crafterly things I'm doing but finding time to post the info is more difficult than it should be.  I think the biggest problem is the 'wanting to do it right'.  I would like to have a banner that stays with me throughout the time I plan to be here and have some thoughts to that end.  Slowly but surely I will get this thing up and running though.  Where there's a Will there's a Kate?  No no it's way.  Just a lot of royal coverage happening in these here parts right now.